Seed-Starting: Hacks and Best Practices
- Thomas Cagney

- Feb 28, 2021
- 7 min read
Updated: Apr 7, 2022

It is now late February, and the urge to start my seedlings for the 2021 season is overwhelming. The meme above represents every gardener's temptation to jump-start their garden vs. a balanced approach of waiting for the recommended period to start their season. The best method to gaining an early start on the growing season is starting your seeds indoors.
This blog will cover seed-starting and money-saving hacks to extend your growing season and stretch your landscaping dollars.
Seeds vs. Greenhouse plants
Seeds are the most cost-effective approach to gardening and landscaping. For example, a single two-dollar package of lettuce seed will produce 2 to 3 crops and remain viable for several years. For most plants, the seed package costs are a fraction of the cost of one garden store plant. For example, twelve tomato plants from seed will cost about twenty cents each vs. $3 to $4 per greenhouse tomato plant.
Seed Viability Chart

Extend your seeds' life by storing your collection in a sealed container in a freezer or unheated shed.
Know your seed types
Seed classification is needlessly complicated. Below are simple definitions of each classification.
Non-GMO: GMO is the acronym for "Genetically Modified Organism." This classification is not relevant to home gardeners as GMO technology applies only to industrial crops such as cotton, soy, or wheat. Fortunately, our mad scientists have not tempered with your Brandywine tomatoes or Kentucky Wonder pole bean seeds (yet).
Heirloom: This classification is most relevant to home gardeners. Heirloom plants traits:
Open-pollinated: Heirloom plants are pollinated through wind, birds, and insects. They do not require human intervention. Heirloom plants include squash, tomatoes, beans, etc.
Feature stable genetics: By most definitions, heirloom plants have been genetically stable for at least 50 years. These plants pass on the same traits year after year.
Enhanced Durability: Most heirloom varieties were cultivated in a specific region. Heirloom varieties grown in their native region are better adapted to local pests, soil types, and weather conditions.
Hybrid: These plants are bred for desired traits, such as size, sweetness, color, drought tolerance, etc. Contrary to popular belief, you can harvest seeds of a hybrid plant. But unlike heirloom seeds, there is no predicting what genetic traits will be passed to the next generation.
Organic: Organic seeds are collected from plants grown with fertilizers and pesticides approved for organic use. The principal reason for buying organic seeds is to support organic farming practices.
USDA Certified Organic: The highest level of organic certification.
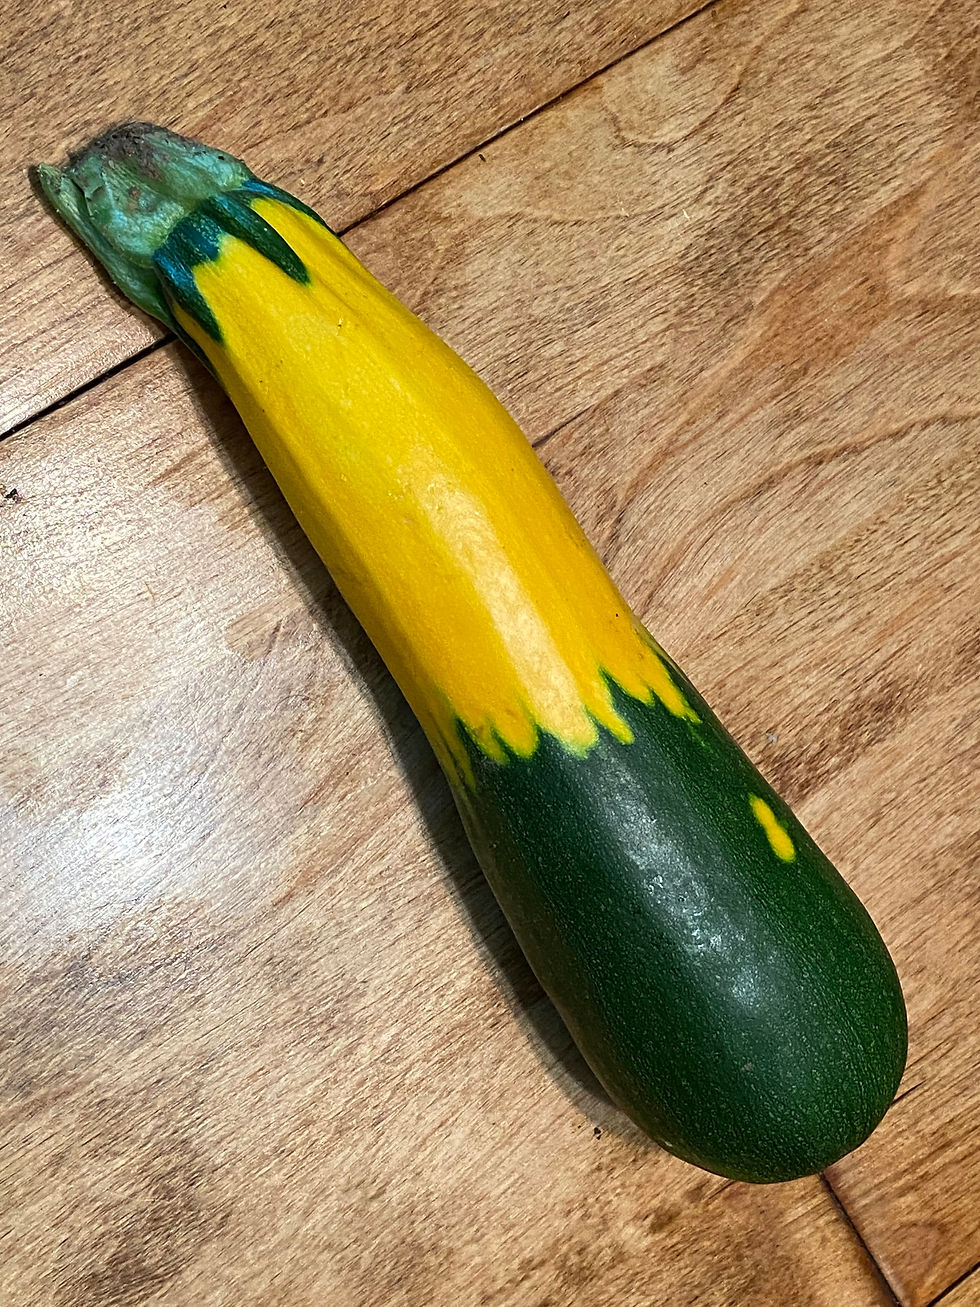
Here is an excellent example of a hybrid vegetable from open pollination. Last summer, I grew green and golden zucchini in the same area of the garden. Bees covered with golden zucchini pollen visited the green zucchini flowers. The result is one-of-a-kind produce. I should apply for a patent!
Seeds you only buy once
Savvy growers practice the autumn rite of collecting seeds for the next season. Autumn seed collecting offers a free seed source for many varieties. Below is a list of plants that share their seeds for an autumn harvest. Many of these plants are self-sowing (morning glory, cleome, butterfly weed). Learn to recognize the emerging spring seedlings of self-sowing plants and let nature do the hard work!


Learn to recognize the emerging spring seedlings of self-sowing plants and let nature do the hard work!
Left: A tomato seedling and a squash seedling emerge from my compost pile.
When to start seeds indoors?
For gardening fanatics, the more appropriate question is, "What is the earliest date to start seeds? Your planting dates depend on the region. My earliest seed crop for planting trays is arugula, followed by lettuce and other leafy greens (late March to early April). Early to mid-April, I start the warm weather seeds (pepper, tomato, eggplant, sweet basil, squash, and cucumber).
Once your seeds sprout, take advantage of days over 50 degrees to put your seed trays in the open air. The cooler air, direct sun, and wind resistance harden seedlings and prevent "damping-off"(Seedlings collapse at the base).
Below is a sample seed starter chart. These charts are available by region online.

Starting your seeds indoors
Your first order of business is to have your planting materials ready.
Notebook and Pencil
Draw the plant tray in your notebook
Label each cup in the tray with what seed is planted
Log the date
Seed Trays
I use the 3-row x 6-row seed trays. Garden centers are usually generous with providing used trays. If you are reusing a plant tray, wash with warm soapy water to reduce fungal diseases.
Planting Medium
I recommend a seed starter mix. Seed starter mixes are "soil-less," which ensures your planting medium is sterile, pest-free, and does not contain unnecessary fertilizer. Avoid compost, potting soil, or garden soil as they become compact and damp, which may hinder the seedling's root system's ability to provide oxygen to the plant.
Masking Tape and Permanent Ink Marker
I recommend masking tape and a permanent ink (sharpie) marker to label each tray's compartment. Despite what you believe, you will not remember what you planted in each compartment, and you will not recognize seedlings when they sprout. So be prepared- label everything in your notebook and on the tray!
Spray Bottle
To prevent the smaller seeds from pooling while being watered, It is best to use a spray bottle to mist the seed tray vs. using a watering can. Soak thoroughly with your spray bottle, but don't let the water pool.
Time to Plant Your seeds!
Create a system that keeps you organized and your seedlings thriving
Plant early crops in a separate tray (s)
Lettuce, arugula, cilantro, parsley, and cabbage crops (broccoli, kale, collards) tolerate cooler temperatures. Using separate trays, you can differentiate the amount of sun and cool temperature exposure between spring and summer seedlings.
Other bookkeeping hacks :
Alphabetize your seedlings within each tray
Separate flower seedlings and vegetable seedlings
The seedlings of different pepper, squash, or tomato varieties are difficult to differentiate. Therefore, if you start more than one variety of these plants, use separate trays.
Starting your seeds
Paper towel hack
I like to guarantee germination for larger seeds before I commit to the garden or seed tray. My approach is to germinate the seed in a damp paper towel and plant only the germinated seeds =100% germination!
Paper towel Hack Process
Lay seeds on a paper towel or a paper napkin.
Fold the paper towel into quarters with the seeds in the middle layer.
Label the paper towel with a sharpie (permanent ink marker).
Soak the paper towel in water.
Squeeze excess water with your hands.
Keep seeds moist for the following t seven to ten days.


As the seeds sprout, plant them in your seed tray.
I use this hack for squash, cucumbers, eggplant, tomatoes, beans, peppers, and nasturtium.
For eggplant, peppers, and tomatoes, transfer the seeds to the seed tray immediately after sprouting. Otherwise, their hairlike roots get tangled in the paper towel fiber.
The bean seeds in this demonstration began to germinate after 4 days. I plant the germinated seeds directly into the garden for beans and peas.
.
Planting in seed trays
For plants with smaller seeds, I plant them directly in the tray. The process is simple:
Guidelines
Label each cubicle before planting.
Back up your labels in a garden notebook.
Complete one cubicle at a time.
Soak the completed tray with a water bottle.
Process
Fill the plant tray with the seed starter mixture.
Carefully sprinkle the seeds on the surface of the seed tray compartment.
Cover seeds by gently stirring seeds into the soil mixture with a pencil.
When the seed tray compartments are occupied with seeds, thoroughly soak the tray with a spray bottle.
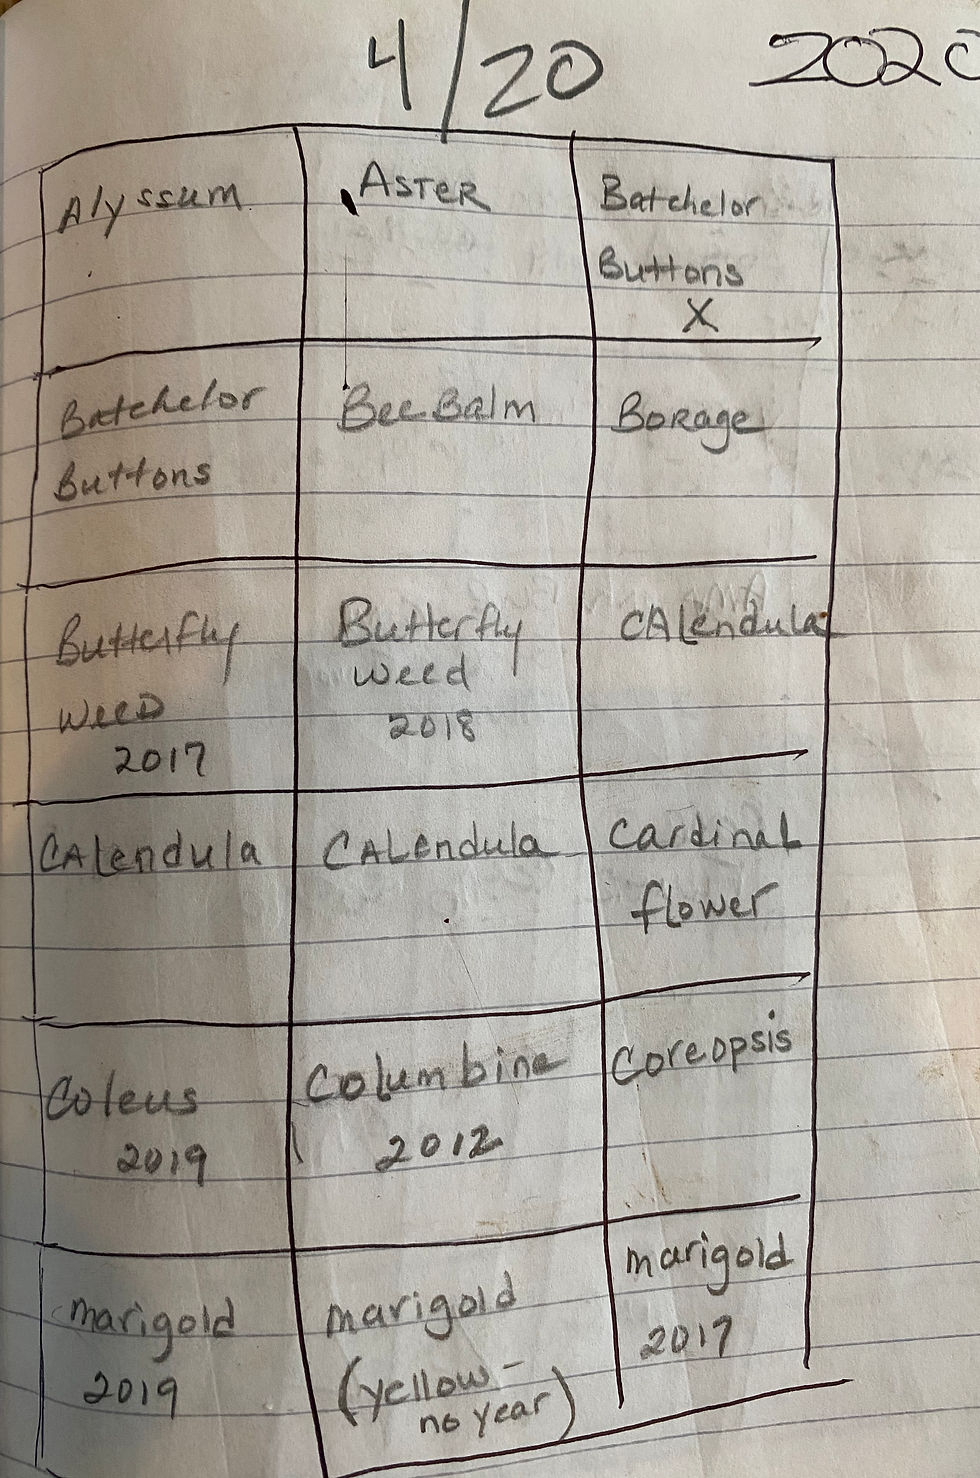
Above: A page from my garden notebook. The drawing depicts the seed tray. Notice the plantings (all flowers) are in alphabetical order and date stamped. The year included with each variety denotes the year I collected the seed.
Cautionary tales (speaking from experience!)
Avoid using too much seed in each compartment. The overcrowding compromises the growth of the seedlings, and you will exhaust your seed supply.
Don't let water pool in the tray. The pooled water will concentrate floating seeds in the middle of the compartment or overflow seeds into the next compartment, ruining your perfect bookkeeping system!
Keep warm weather seedlings inside when the temperature dips below 50 degrees. Extended exposure to cold weather will stunt their growth.
Care and Maintenance of your seedlings
Now the real work starts. After your seedlings emerge, they will require daily sunlight, wind, water, and warmth. Unfortunately, I don't have a greenhouse or use artificial lighting or heating pads, so I move my seed trays into the sun by day and bring them inside at night.
Time to plant your seedlings outdoors
There are three conditions for planting your seedlings in the garden.
The threat of frost has passed.
The ground is warm enough (varies by plant).
Your seedlings have formed their secondary leaves.

Squash seedling sporting secondary leaves.
Stock Photo
Transplanting hacks and best practices
To separate multiple seedlings growing in one section of your seed tray:
Remove the whole section from the tray; the tangled roots will keep the starter mix intact.
Submerge the seedlings up to the primary leaves in a shallow bowl of water
The water loosens the seed mixture around the roots allowing you gently peel each seedling away from the root mass without damaging fragile roots.
When you plant your seedlings in the garden:
Loosen the dirt and remove the clumps
Dig a hole about six inches deep and 6 inches wide
Add compost to the hole.
With the roots dangling over the hole, bury the seedling up to its primary leaves.
Water
Bonus Hack- Regenerating Kitchen Scraps
This hack is a winter diversion to bridge your gardening obsession from fall to spring. Several varieties of kitchen produce regenerate when placed in a shallow pool of water. So after chopping your celery, Bok choy, lettuce, green onions, or leeks, place the stalk in a bowl of water on a sunny window and let nature take its course. When roots appear, move the plant to a potting container.


Top Left to right: lettuce, carrot, celery
Bottom: green onions, rosemary, bok choy
Some gardeners use a more advanced approach to starting seeds, using warming trays, artificial lighting, and hydration devices. If you are interested in a more high-tech approach, check out these two links to the Joe Gardner podcast.

All photographs, unless otherwise noted, were taken on our one-acre property in eastern PA.
Photographs by SuperNaturalist.net

Comments